Physical Inventories
Plan, conduct, and reconcile physical inventories to ensure stock accuracy
Table of Contents
1 Introduction to inventories
A physical inventory consists of actually counting all items in stock to verify that quantities in the system match reality.
Full inventory
Physical count of all items in all locations of the institution.
Recommended frequency
1 to 2 times per year (end of school year)
Partial inventory
Targeted count of certain locations or specific item categories.
Recommended frequency
Quarterly or as needed
Why conduct inventories?
- Data reliability: Verify that computer stock matches physical stock
- Detect losses: Identify theft, breakage, or data entry errors
- Optimization: Spot immobilized or expired items
- Compliance: Meet accounting and legal requirements
2 Inventory structure
A GO4STOCK inventory is organized in 3 hierarchical levels to facilitate teamwork.
Hierarchical organization
Inventory (General level)
This is the global inventory session. It contains one or more zones to count.
Example: "Annual inventory 2025" or "Main warehouse inventory - Q1"
Inventory zones (Locations)
Each zone corresponds to a physical location (Main warehouse, Teachers' room, Library, etc.). A zone can be assigned to a specific user.
Main Warehouse → Assigned to Mr. Smith
Teachers' Room → Assigned to Ms. Johnson
Library → Assigned to Mr. Brown
Count sheets (Items)
For each item present in the zone, a count sheet is automatically generated with:
Theoretical quantity
What the system indicates (120 notebooks)
Actual quantity
What is physically counted (115 notebooks)
Automatically calculated difference
115 - 120 = -5 notebooks (missing)
💡 Advantage: This organization allows work to be distributed among multiple people and precisely track progress zone by zone.
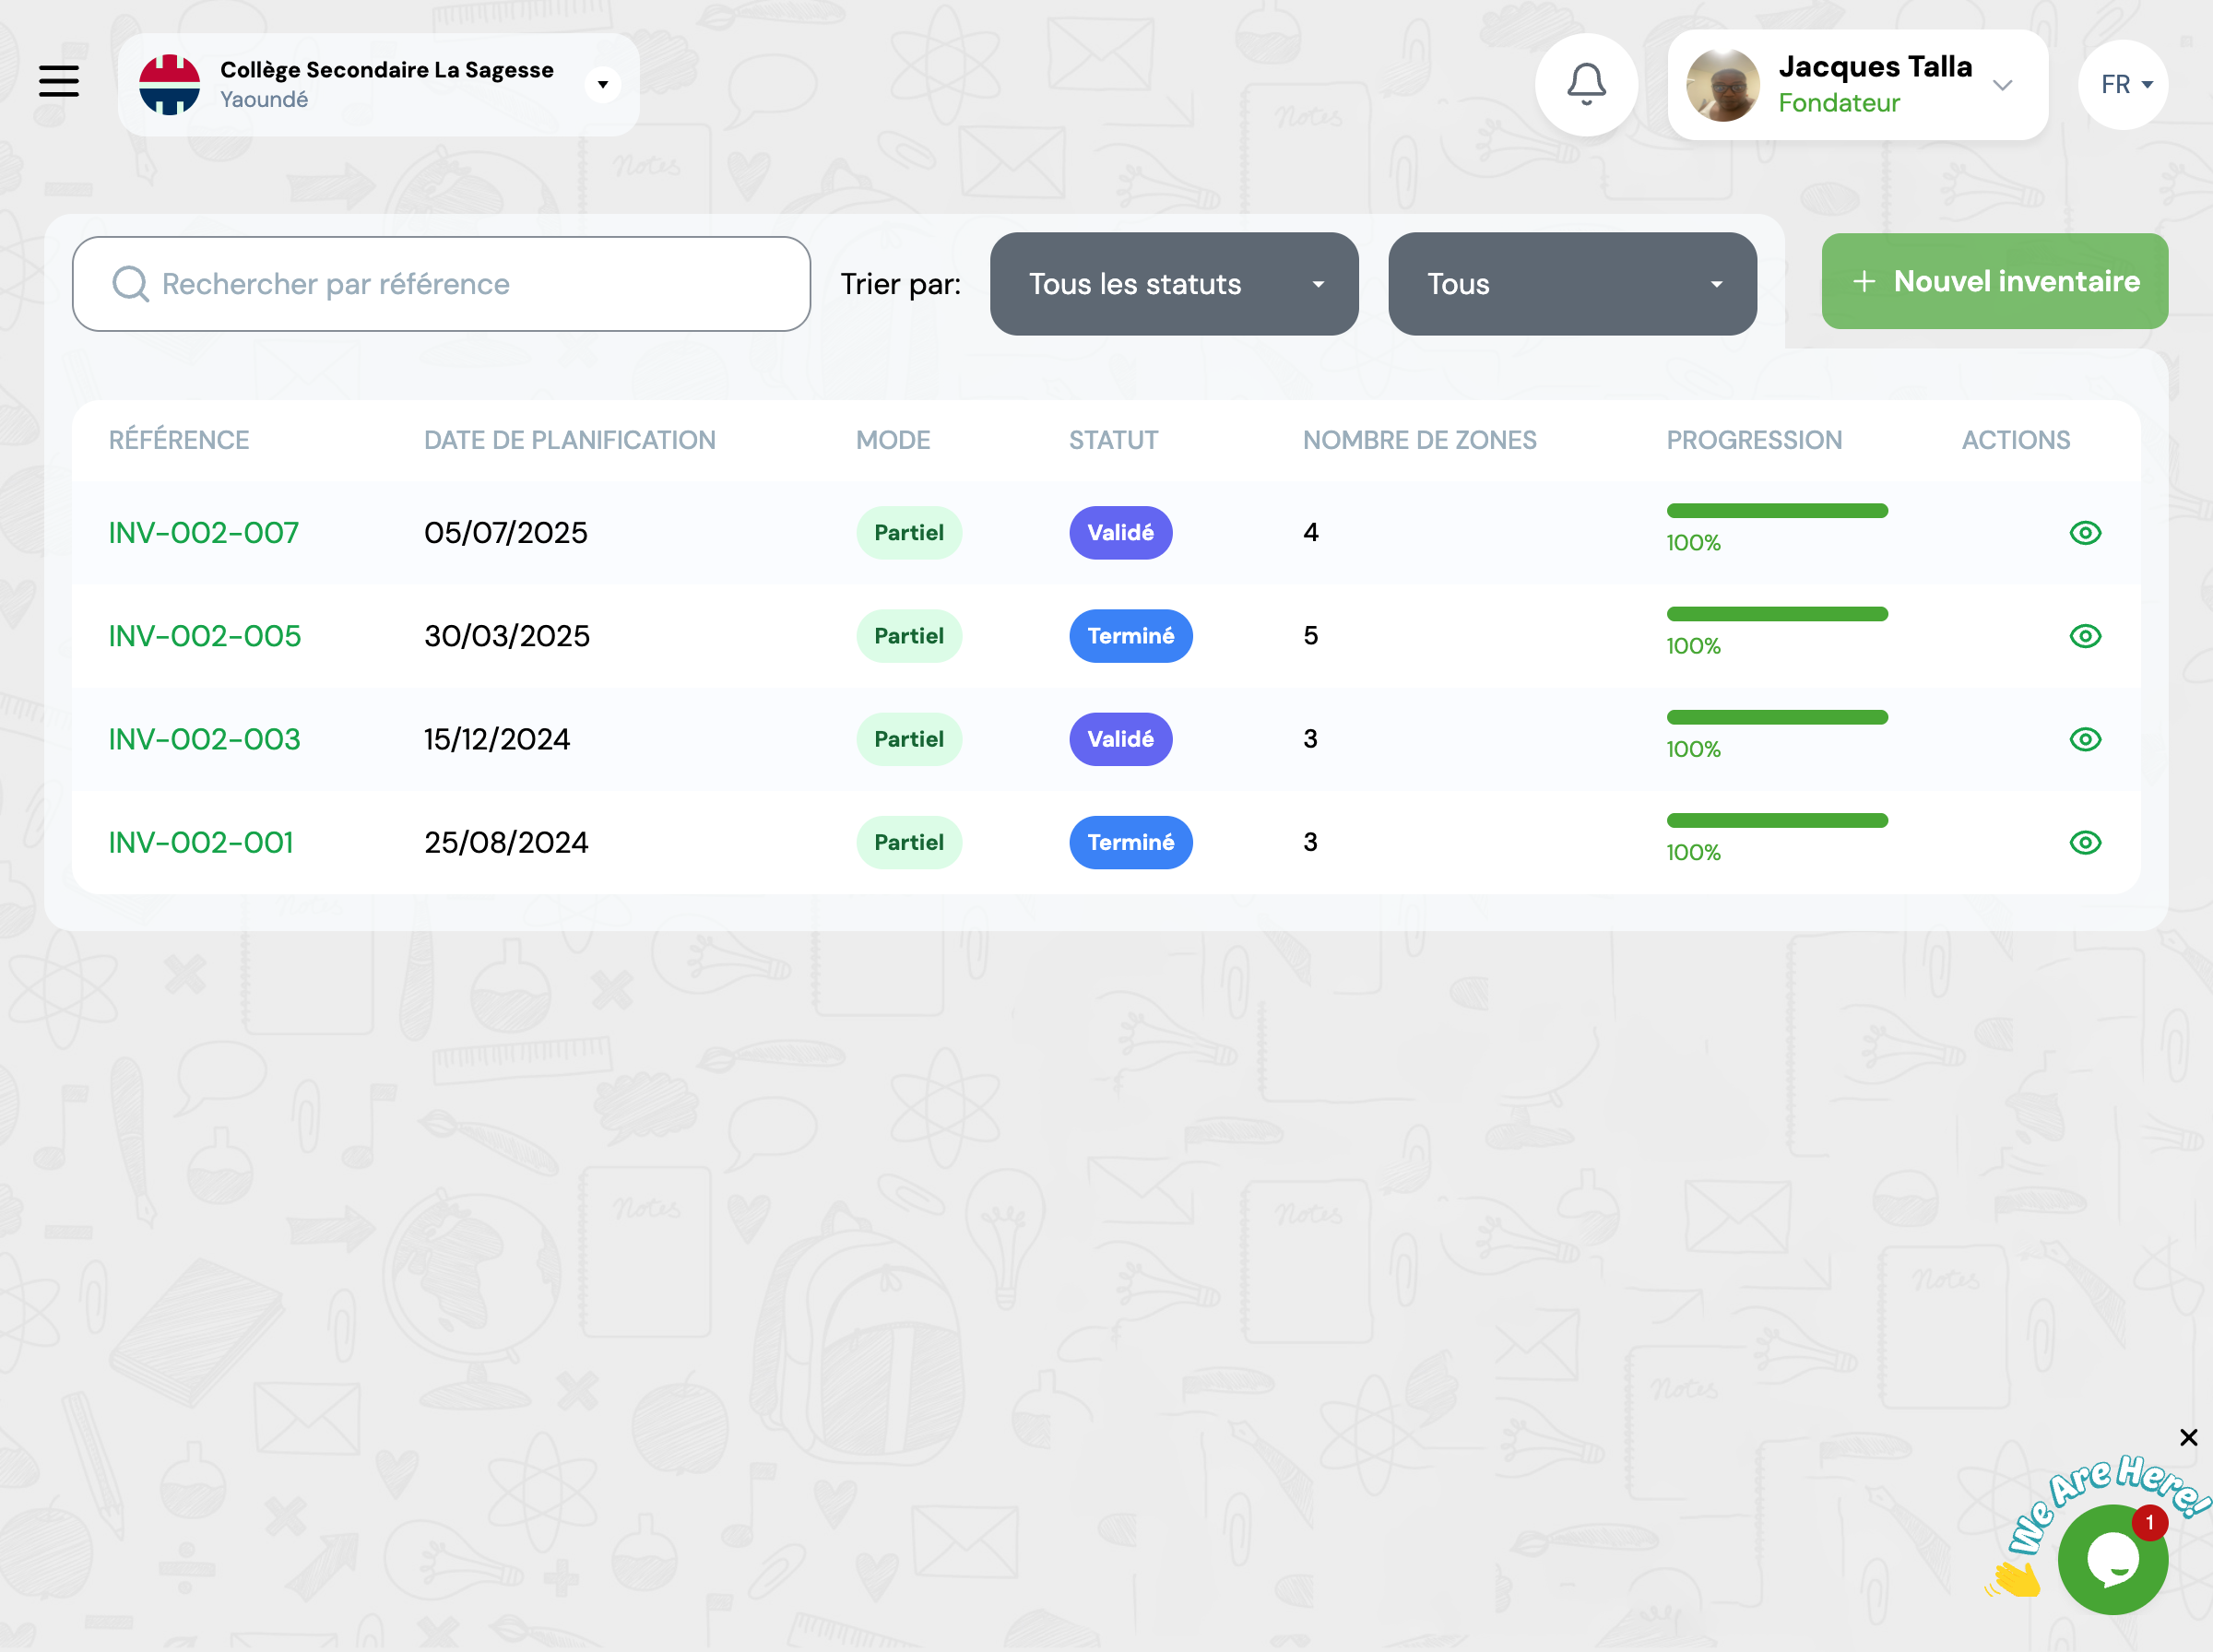
3 Plan an inventory
Create the inventory
Go to GO4STOCK > Inventories and click "New inventory".
Planning date
Choose the planned date for performing the physical inventory.
Inventory mode
Complete
All locations will be automatically included
Partial
You manually select locations to count
Select locations
If you chose Partial mode, check the locations you want to inventory.
Save and start
Click "Create inventory". The inventory is now in PLANNED status.
Then click "Start inventory" to change to IN PROGRESS status.
✅ Automatic: As soon as you start, the system automatically generates all count sheets with pre-filled theoretical quantities.
Example: End-of-school-year inventory
Planning date: 06/30/2025
Mode: Complete (all locations)
Locations included:
- • Main Warehouse (245 items)
- • Teachers' Room (87 items)
- • Library (312 items)
- • Laboratory (156 items)
- • North Annex (92 items)
Total: 5 zones - 892 items to count
4 Perform counting
Assign zones to users
To work as a team, assign each zone to a specific user. They will be responsible for counting in their zone.
Mr. Smith
Stock Manager
📦 Main Warehouse (245 items)
Ms. Johnson
Teacher
👨🏫 Teachers' Room (87 items)
⚠️ Note: A user can also start counting themselves without prior assignment. The system will assign them automatically.
Start a count zone
The assigned user (or any authorized user) clicks "Start counting" for their zone. The zone changes to IN PROGRESS status.
💡 Tip: Count sheets are generated automatically with theoretical quantities. You just need to physically count and enter actual quantities.
Enter actual quantities
For each item in the zone, enter the physically counted quantity.
100-page notebooks
Ref: ART-2025-0123
Theoretical quantity
120
Counted quantity
Difference
-5
Additional options:
📸 Anomaly photos
In case of significant difference, take photos for justification
📝 Explanatory notes
Add comments to explain differences
Complete zone counting
When all items in the zone have been counted, click "Complete counting". The zone changes to COMPLETED status.
✅ Progress: The system automatically calculates global inventory progress. Example: 2 zones completed out of 5 = 40% progress.
5 Complete lifecycle
Inventory workflow
Inventory has been created with date and selected locations.
Count sheets have been generated. Teams are counting items.
All zones have been counted. Inventory is ready for validation.
A manager has approved the results. Ready to close.
Adjustments have been applied to stock. Correction movements have been automatically created.
✅ Inventory completed - Stock updated
6 Managing differences
A difference appears when the counted quantity differs from the theoretical quantity in the system.
Negative difference (Missing)
Theoretical: 120 notebooks
Actual: 115 notebooks
Difference: -5 notebooks
Possible causes: Theft, loss, breakage, entry error during exit
Positive difference (Surplus)
Theoretical: 80 pens
Actual: 87 pens
Difference: +7 pens
Possible causes: Unrecorded entry, counting error, unrecorded donation
Automatic adjustment application
When you close the inventory, the system automatically applies all adjustments:
1️⃣ Global stock update
Total stock of each item is adjusted according to detected differences
2️⃣ Location stock update
Stock at each location is corrected with actual counted quantity
3️⃣ Adjustment movement creation
A stock movement is automatically created for each difference:
- • Negative difference: Exit movement (type: inventory adjustment)
- • Positive difference: Entry movement (type: inventory adjustment)
🔍 Traceability: These movements carry the reference INV-ADJ-[INVENTORY_REF] and are viewable in movement history.
Difference report
After closing, view the detailed difference report:
| Item | Theoretical | Actual | Difference |
|---|---|---|---|
| 100-page notebooks | 120 | 115 | -5 |
| Blue pens | 80 | 87 | +7 |
| White erasers | 150 | 150 | 0 |
7 Best practices
Plan outside class hours
Perform inventories on weekends or during holidays to avoid stock movements during counting.
Work in pairs
For important zones, assign two people: one counts, the other enters. This reduces errors.
Photograph significant differences
For any difference over 10%, take a photo. This helps understand the origin of the problem.
Block movements during inventory
Prohibit any stock entry or exit during counting to ensure reliability.
Document differences
Use the 'Notes' field to explain each significant difference. This facilitates future audits.
Recount in case of doubt
If a difference seems suspicious, recount immediately before validating the zone.
Analyze trends
Compare differences between multiple inventories to identify problematic categories.
Respect the schedule
Complete inventory within a reasonable time (1-2 days maximum) to avoid untracked movements.
8 Frequently asked questions
Can I cancel an inventory after closing?
No, once closed, an inventory can no longer be cancelled because adjustments have already been applied to stock. If you discover an error, you'll need to create manual correction movements or perform a new partial inventory.
What if I find an item not in the system?
If you find a physical item not appearing in count sheets: 1) Note it and set it aside, 2) After inventory, add this item to catalog, 3) Create a manual stock entry with type 'inventory correction'.
- Note it and set it aside,
- After inventory, add this item to catalog,
- Create a manual stock entry with type 'inventory correction'.
Can I continue an inventory over several days?
Yes, that's the advantage of the zone structure. Each zone can be counted independently at different times. However, try to limit total duration to 2-3 days maximum to avoid unrecorded movements distorting results.
How do I interpret a 0 difference but physical difference?
If the total is correct (difference = 0) but items are different from what's recorded, this may indicate: confusion in item designation, untracked item exchange between locations, labeling error. Document this situation in notes and investigate to understand the origin.
- • confusion in item designation
- • this may indicate: confusion in item designation
- • labeling error. Document this situation in notes and investigate to understand the origin.
Document this situation in notes and investigate to understand the origin
How often should I perform inventories?
Recommendations:
- Recommendations: Complete inventory 1-2 times per year (end of school year and/or beginning), Partial inventory quarterly for high-turnover zones, Targeted inventory whenever significant difference is suspected.
- Recommendations: Complete inventory 1-2 times per year (end of school year and/or beginning), Partial inventory quarterly for high-turnover zones, Targeted inventory whenever significant difference is suspected.
- Recommendations: Complete inventory 1-2 times per year (end of school year and/or beginning), Partial inventory quarterly for high-turnover zones, Targeted inventory whenever significant difference is suspected.